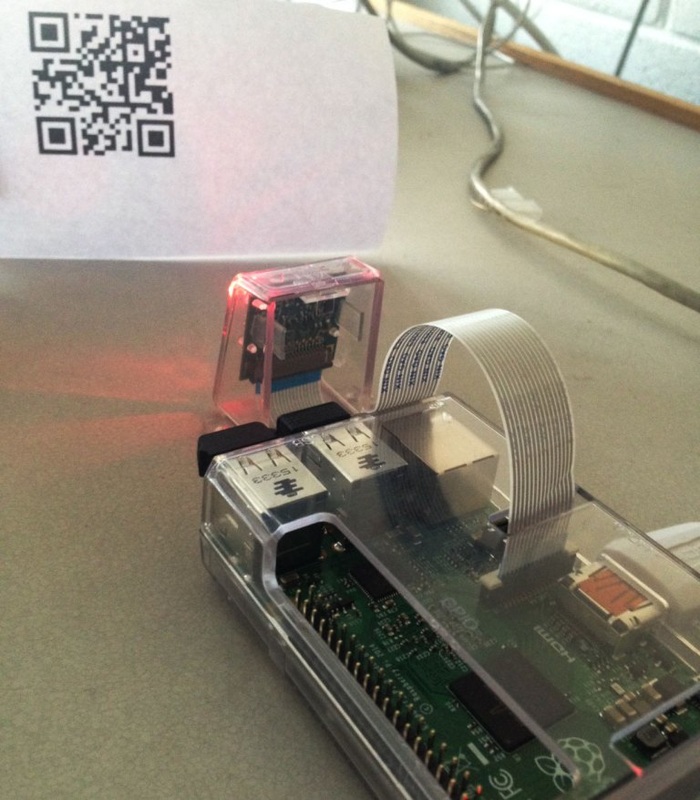
Putting IBM’s blueix to the side for a while and to start building the qr scanner system like a good idea as once we have the front end working we can fiddle with the back end. We had a look around for different qr scanning systems and libraries but we want something away from a computer or a phone. We found a couple of python libraries that allow the scanning and extracting data of a qr code. Luckily python runs very nicely on a raspberry pi which is a small portable computer.
We decided to go with a pi 2 as it had better ram than a pi one in hope of a faster run time. Utilising the raspberry pi’s own camera module seemed like a good idea as the pi will have more capabilities with it over a standard webcam.
Our first build day was split into two parts
Part one – Play around with the camera module to see the quality of photos and learn how to control it.
Part Two- use a qr lib in order to scan a basic qr code and display text on screen.
The first part went well, we learnt how to control the camera taken pictures including there name and file format. Along with how to start and stop a preview and control the size of the preview window. We learnt that the preview window does not display the whole image but cuts off around 10% along the edges, put that 10% is included in the captured image.
During the second part we looked into how to scan qr codes in python from an image. Although we found libraries it did prove difficult to understand the code in the examples at first. We ended up using a library called qrtools.
https://launchpad.net/qr-tools
With this we were able to take an image scan it pull the text out and then sent that up to mqtt.
We have encountered a few problems with this part of the build process
- Focus – the pi has no focusing method its set to specific focus point and can’t change which meant if code was to close it could not scan it. To fix this we are going to make a stand that will put the cup the correct distance away.
- QR code – the more text on the code the hard it is to read. We found that above 50 words the pi camera module cannot read the code clear enough to scan. To fix this we are going to only have a user name on the qr code and store their bio on our website. Allowing the pi to change our site with their username to pull down the relevant information.
 RSS Feed
